Friday, August 26, 2011

DIY Project - Cedar Chest

The other day I was browsing around Craigslist for a bargain DIY project. I cam across a mid sized cedar chest for free in my city. Wow what a find! As I looked at it more it had "Crystal" deeply engraved in huge letters on the front and various chew marks, scratched, dents, and chunks missing. It did cause me to pause as my name is not Crystal nor do I know anyone by that name. It was free after all and I only had to drive 3 minutes to pick it up. So the next day I picked it up.

Unfortunately, I did forget to take a picture of the "before."

So I brought it home. I spent a day sandpapering the heck out of the entire piece. I then filled in all the cracks, dents, scratches and bite marks with wood filler. Let dry for a day, then sand paper again.

...But I really could not fix the "Crystal" in the front. I tried sanding it down, but I could not get it to blend. Frustrated I went online to find a fix. I thought of all the woodworking pieces that JoAnn Fabrics sells. I went online and found a perfect fit! a 19in by 4 in pine wood plaque. It would fit over the "Crystal" issue perfectly!

I found a coupon code online for 50% off any purchase for JoAnn Fabric online purchase. So the plaque was only $7. I then went to the store looking for a wood word to put on the front. Luckily I came across a small bin in the back corner that had just what I was looking for.. "family" in wood. Best part.... it was on clearance for only 50 cents AND I had another 50% off coupon!

With three different kinds of woods and a different color wood filler, I decided it would be easiest to paint the chest to match my green, brown and white bedroom. Found paint brushes, painters tape and drip sheet at the dollar store and used paint and spray paint I had left over from other projects. I took apart the chest, spray painted the hinges/bolts, primed all the wood and painted it white/green. After I finished the project. I looked at it. It looked so freshly painted, it bugged me. I took sandpaper to distressed it.... giving me my finished project.


"Family" Hope Chest --- Total Cost: $10.25


Sunday, July 24, 2011

Beauty Tip #02 - Body Scrub

Body Scrubs are essential for summer. With all the fun in the sun it is very easy to forgo weekly exfoliation, but for smooth, supple skin it is so important. Being unemployed for sometime I do not have the resources to dedicate to exfoliation. In high school I had a business selling homemade soap and spa items where I picked up a few tricks.

To make homemade body scrub all you need is 1c episom salt, 2tbsp olive oil, 1tsp baking soda, and 1/2tsp essential oil mixed together. I love using peppermint oil in the summer as it adds a cooling effects. I sometimes add dried peppermint leaves to the mix too.Very refreshing!


You can add also add other additives and dies depending on your mood like rose buds, lavender, etc.

Down Home Recipe #06 -Healthy Fries and Ranch!

Like so many women out there I struggle with my weight. That's why I am always looking for great ways to serve healthy meals that are more then rabbit food. This past weekend I was inspired by a visit to a Greek restaurant. The next night I served chicken skewers soaked in seasoning and applesauce, baked yam fries, a small green salad and a cucumber ranch for dipping. It was so delicious that no one believed me that it was good for you.

Chicken Skewers:
4 chicken breasts cut into cubes and placed on a skewers with 1/8" space for evening cooking. Place skewers in casserole dish. Mix 2c applesauce with 1tbsp olive oil, 1 tbsp oregano, 1 tbsp thyme, and 1 tbsp rosemary.
Pour over chicken. Marinate for 2 hours before BBQ.

Baked Sweet Fries:
Wash 4 yams. Cut into 1/2" slices. Place on greased baking dish. Sprinkle lightly with salt, garlic salt or chili powder. Bake at 350 for 30 minutes or until golden.


Cucumber Ranch:
Peel and shred one large cucumber. Place in paper towel and let rest in fridge over night. Get as much moisture as you can get out of the cucumber slices, put in blender. Add 12oz plain Greek yogurt, 1/4 tsp salt, 1/2 tbsp garlic, and 1/2 tsp mint. Blend until smooth. Store in fridge. It will solidify within a day or two.

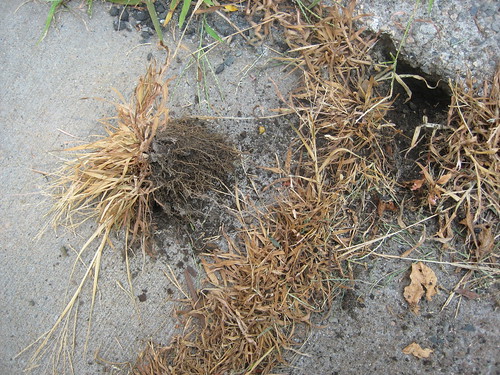
A Green Way to Remove Weeds

After spending days power washing and hand weeding our 25 sq ft brick patio, I was very discouraged to find a mere 2 days later little green weeds starting to pop up.

I have two miniature schnauzers who have a tendency to put everything in their mouth in the backyard, so the use of any chemicals is out of the question. I needed to figure out how to fight this losing battle.

My grandma who lives nearby has starting using only green methods to do her gardening, she suggested using vinegar. I had some basic vinegar in my cupboard for cooking. I put some in a spray bottle and tried it out on a little patch. It killed them all!


The trick is to make sure everything is dry if any water is exposed to the weed before it dries out completely it will grow back.

You can get two gallons of vinegar perfect for weed killing from Costco for $4!!!

Good luck and happy weeding :)

Monday, June 20, 2011

Down Home Cooking Recipe #05 - Ranch Chicken Calzones

One of my favorite grocery stores is Trader Joe's. Those who are not familiar with this chain, it is a small grocer focused on organic and healthy foods. This past week I found one of the best finds there.... Pizza Dough for $1!

They had three types, plain, whole wheat, and garlic herb. I picked up two packages of the garlic herb to make calzones for my family and parents for Father's Day. These were a HUGE hit, inexpensive to make and ooh so GOOD!


Servings Size: 4 Calzones

What You Need:
1 pkg (20oz) garlic herb pizza crust
2c cooked chopped chicken
2c cooked chopped broccoli
1/4 ranch
1 egg
1 tsp onion powder
2 garlic cloves minced
1c mozzarella cheese shredded
1c provolone shredded
1/2c butter
1 1/2 tsp pizza seasoning (Italian seasoning will work)

How to Make:

1) Preheat oven to 450 (f). Grease baking sheet. Divide pizza dough into 4 parts, rolling out four 8in circles.

2) In a large bowl whisk egg, onion powder, 1 tsp pizza seasoning, and minced garlic. Stir in ranch, chicken and broccoli. Mix in cheese.

3) Spoon mixture into center of each dough circle. About 1 cup mixture each. Fold over dough and seal. Cut 2 small air vents on the top of each calzone.

4) Melt butter in microwave. Mix in remaining pizza seasoning. Brush butter mixture onto each calzone.

4) Bake the calzones for 15 minutes, re-brush with butter, then put in for 5 more minutes or until outer calzone is lightly brown and crunchy. Let sit for 5 minutes before serving.


You can change the fillings as fits your taste. For the less picky eaters in my family I enjoy serving a roasted red pepper, spinach, and fresh mozzarella pizza.

Monday, June 13, 2011

Down Home Cooking Recipe #04 - Amazing Truffles

This is a family favorite my grandma use to make them for Christmas every year, now I make them along with 6 other candies for all our friends and family. You can find these truffles in bakeries for .75 a piece. You can make a batch of 50 for less than $4! Whats even better you can change the flavors and coating to suit your needs.

I made 500 brown and pink of these truffles to serve at our dessert buffet at our wedding. They were a HUGE hit! 


What You Need:
1 (8oz) package of softened cream cheese
3c confectioners' sugar
3c chocolate chips (you can use any type: white, caramel, dark, etc.)
1 1/2 tsp flavoring (examples: vanilla, raspberry, orange, mint, etc.)
1/4c sprinkles (you can also use powdered sugar, chopped nuts, or you can dip them in almond bark)


How to Make:

1) In a large bowl, beat cream cheese until smooth. Gradually add in confectioners sugar until smooth and blended. 

2) Melt chocolate chips in 30 sec intervals, stirring occasionally until smooth. Mix in with cream cheese and sugar. 

3) At this point you can divide the mixture to make various flavors from one batch. Add flavoring to each batch. Stir until well blended.

4) Refrigerator for an hour. Roll into balls, then roll each ball into sprinkles or any other coating.

Keep Refrigerated

How to Clean Out A Microwave

While cleaning a microwave on a daily or even weekly basis is not a problem, this post is for those who have neglected their microwave until it seems like quite a task to clean it out. Keeping your microwave clean is very important to keep your food safe and tasting good. 


One important thing to mention is to make sure that you don't use any harmful chemicals in your microwave. I don't ever use anything in my microwave that I would not use on my dishes.

Anyway back to the tip. The best way to start is to mix 2c. water with 2 tbsp. of white vinegar and 1 drop of dish soap in a glass container, such as a glass measuring cup. Put the cup in the microwave for 4 minutes. The water mixture should boil over. Let sit in the microwave for several minutes. The steam/vinegar mixture will loosen any caked on junk in your microwave.

Dip a washcloth in the water mixture and wipe out the microwave. Everything should wipe off very easily and deodorize. For additional cleaning/deodorization power sprinkle baking powder inside before wiping down.